Building a Web Link / Button
This very simple tutorial provides step by step instructions for building a web link into a 3D webpage.
- Make a new folder/directory for this world (eg. call it SimpleLink) - use the Operating Systems desktop environment to achieve this.
- Start the VRMLmagic Application
- Save the initial default world in the new directory (SimpleLink) as SimpleLink.wrl - use menu File - Save As...
Now we're ready to begin building it
- Add a new Object - use menu Objects - Add Object
- Choose any of the primitve objects (just for this example, generally you can use anything you like) & Click OK
- Now select the object and use menu Objects - Edit Object Atributes
- Give it a new surface (try one of the predfined surfaces, see button in upper right of dialog)
- Now lets make it a web link
- Click on the Touch Event handler button in the lower left of the Attributes dialog
- Click to activate the Touch tab
- Give it the "Go to URL" pre--defined action and insert your URL
- Click to activate the IsOver tab (this is optional)
- Choose a pre-defined action that loops (eg. Spin)
- OK the event handlers dialog
- OK the Object Attributes dialog
- Save the world (try using File - Save (will save over oldname))
- Preview in webbrowsers(s)
Building a 3D Logo
Simple step-by-step guide to taking a company symbol (in the form of a 2D graphic image) and turning it into an interactive 3D logo.
- Make a new folder/directory for this world (eg. call it Logo3D) - use the Operating Systems desktop environment to achieve this.
- Start the VRMLmagic Application
- Save the initial default world in the new directory (Logo3D) as Logo3D.wrl - use menu File - Save As...
Now we're ready to begin building it
- Add a new 3D Extrusion Object - use menu Objects - Add Object
- Choose the 3D Extrusion Object type & Click OK
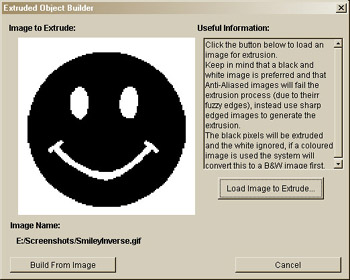
- In the 3D Extrusion dialog load the logo image (eg. use your company logo here or ExtrusionImages/InverseSmiley.gif (see right) for this example)
- Click OK
- NOTE: if your logo image doesn't have sharp (aliased) edges then this generation phase may not work, take a look at the FAQ sections answer for help with this.
|
 |
- Now select the object and use menu Objects - Edit Object Attributes
- Give it a new surface (try one of the yellow predfined surfaces, see button in upper right of dialog)
- Now lets give it some simple interactivity
- Click on the Touch Event handler button in the lower left of the Attributes dialog
- Click to activate the IsOver tab
- Choose a pre-defined action that loops (eg. Spin Object on Y Axis)
- Click to activate the Touch tab
- Give it a pre--defined action (eg. Go to URL and insert your url)
- OK the event handlers dialog
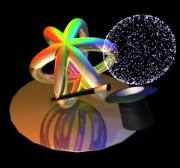
- OK the Object Attributes dialog (the world should look something like the following image)
- Save the world (try using File - Save (will save over oldname))
- You now have an interactive (ie. logo spins while pointer is over and goes to weblink on a click) 3D logo.
- Preview in webbrowser(s)
This tutorial has covered creating an interactive 3D logo, you might like to try the Interactive 3D Navigation Bar tutorial which extends this example into a more complex world.
Making a Light Switch
Demonstrates how to use VRMLmagic to make light switches (or switches that turn on/off any attribute of lights or objects).
- Make a new folder/directory for this world (eg. call it LightSwitch) - use the Operating Systems desktop environment to achieve this.
- Start the VRMLmagic Application
- Save the initial default world in the new directory (LightSwitch) as LightSwitch.wrl - use menu File - Save As...
Now we're ready to begin building it
- Add a new Positional Light - use menu Lights - Add Light
- Choose the positional light type and click OK
- Click on the light in the world (select it)
- Bring up its attributes dialog - use menu Lights - Edit Light Attributes
- Note the Lights ID (in the dialogs title bar (eg. L2 or L#)
- Make it a notable color (eg. bright red)
- OK the attributes dialog
- Add a new Object - use menu Objects - Add Object
- Choose any of the primitve objects (just for this example try a sphere) & Click OK
- Now select the object and use menu Objects - Edit Object Atributes
- Now lets make it the "switch"
- Click on the Touch Event handler button in the lower left of the Attributes dialog
- Click to activate the Touch tab
- Give it the "Linked Light - Toggle Switch" pre-defined action
- Enter the light ID (from earlier point eg. L2) into the Linked Light field
- OK the event handlers dialog
- OK the Object Attributes dialog
- Move the light (drag light item in world) into a position where it will be simple to notice whether it is On or Off.
- Save the world (try using File - Save (will save over oldname))
- Preview in webbrowsers(s)
Note that you can use a variety of events to trigger the on/off nature of a light (eg. use a Proximity Sensor (InRange) to turn on a light when the user moves into a room). You can also set other attributes of lights and objects via triggers of this kind.


